 Organizations of all types need the ability for individuals and teams to be able to create new online content and modify existing content, submit those changes for approval, approve or disapprove that work, and ensure that all the participants in the workflow can see the status of each piece of content in the system and be promptly notified if they must act upon it, to keep the process flowing smoothly. Drupal 7 is ideally suited as a framework for building a website that can support such a workflow setup – with numerous pertinent modules that operate well together.
We will examine some key modules for building this sort of website, as well as how to configure them and set permissions for some basic types of roles invariably employed in such workflows. Our goal is to set up the system so that the mechanics of the workflow are as automated as possible, but with a minimum of complexity.
The Usual Suspects
There are innumerable core and contributed modules that can be employed for crafting an effective workflow, and they tend to be grouped into three categories corresponding to different strategies for implementing whatever type of workflow is desired: Revisioning, Workbench Moderation, and the venerable Workflow.
Choosing one strategy does not preclude using modules geared toward another strategy. Here we will be using the Workflow approach, but it is good to be aware of the Revisioning module – which allows permitted users to create, moderate, and publish content revisions – and Workbench Moderation – a popular alternative which permits moderation down to the revision level.
For any basic content editing and publication system, the following modules can be utilized in some combination:
- Workflow, a critical component, allows you to define workflow states for each Drupal entity type, the transitions that each entity instance makes as it moves from one state to another, what transitions can be performed by each user role, and what optional actions occur for each type of transition.
- Workflow Content Permissions implements permissions to view or edit the fields of any content type that is in a workflow.
- Workflow Extensions makes possible a range of workflow user interface improvements.
- Workflow Post-Install is invaluable when you add workflow functionality to a site with existing content, which consequently has no state. This module lets you set a state en masse.
Letters of Transit
We will demonstrate how to easily put together the essential elements for controlling the transition of content through a workflow. In our simple example, we envision a content writer submitting a new article, which must be vetted by a moderator to confirm that it is appropriate for the website. If approved, an editor will likely polish its content, prior to submitting it to a publisher for final approval before it goes live.
To follow this demonstration, install and enable the Workflow module, including its submodules Workflow Field and Workflow UI. Be sure to assign sufficient permissions for your chosen roles – in this case: writer, moderator, editor, and publisher.
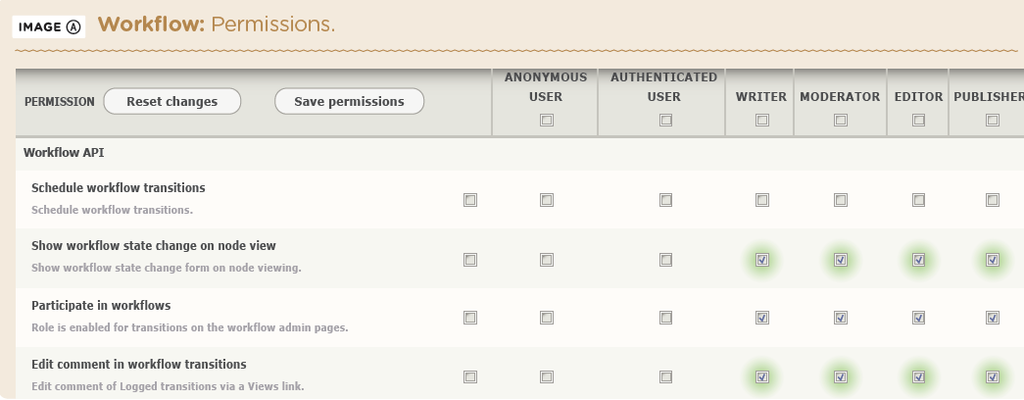
Set the node permissions as you normally would, so that writers can create new content and edit their own, editors can edit all content, all participants can view unpublished content, etc. Also, for the content types of interest (in this case, articles), set the publishing options so new content is not published by default.
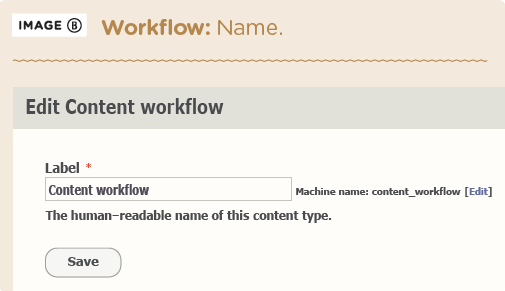 To create and manage workflows, we use the workflow configuration page (at the Drupal path
 admin/config/workflow/workflow). Every new workflow has a descriptive name and a machine name.
Once a workflow has been created, you can add an unlimited number of states, as well as transitions among them. Here we define a few basic states to accompany the built-in "(creation)" state, which is the starting point of any entity instance when it is first created.
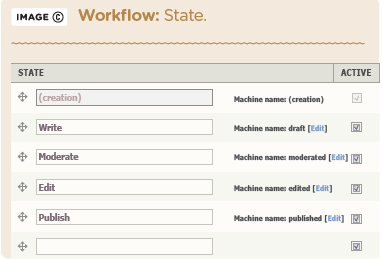 With the states defined, we can specify which transitions are permitted. These include the obvious ones in which the piece of content moves forward in the flow; e.g., the writer submits it to the moderator by changing its state to "Moderate". You should also allow for backward movement, presumably for further revision of content; e.g., the moderator sets the node's state back to "Write" to indicate to the author that it needs further work before it is ready to be moderated again.
For the "(author)" pseudo-role, you must specify at least one state to which a new node can transition from the "(creation)" initial state. Consequently, no new content can be left in the "(creation)" state, making it effectively a pseudo-state.
Why do we have a separate and seemingly redundant "Write" state when we already have the "(creation)" state? Why not simply instruct each author, when a new piece of content is ready for moderation, to change its state from "(creation)" directly to "Moderate" and skip the "Write" state? The latter is needed so a moderator can send the article back to the author for further work, because one cannot set a node's state back to "(creation)".
For each content type you wish to manage with the workflow, add a new field to the content type with the field type of "Workflow".
Within the field settings, optionally enable the workflow history permissions for all relevant roles.
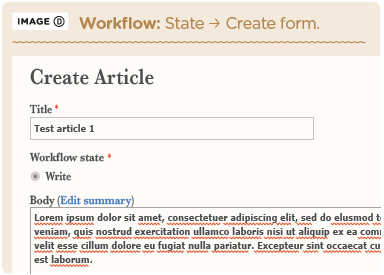
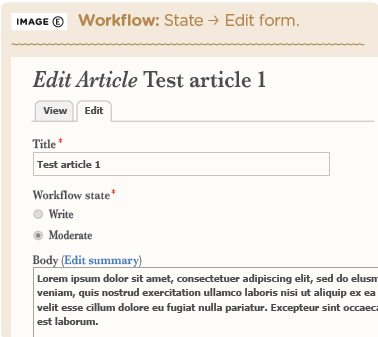
Users of the appropriate roles will now be able to see the current workflow state of each node, as well as change that state to whatever values you have permitted that role. For instance, when creating a new article, the writer will see that the single state "Write" we specified earlier is indeed the default.
Here's Looking at You
 Participants in the workflow naturally would like to see what content they can work on at the moment, without having to sift through individual nodes. Thus they can benefit from views that display those nodes; e.g., a views block can show the moderator which articles need her attention. These additions to the website are facilitated by the Workflow Views submodule. After enabling it, set the "Access workflow summary views" permission for the relevant roles.
When creating such views, be sure to remove the "Content: Published (Yes)" filter criterion. For the workflow state, do not use the raw workflow state field, but instead the appropriate "New state name", so you can compare its value to an actual state name ("Moderate") and not its non-descriptive integer value in the workflow_states table.
You can also use the prebuilt view, "Workflow dashboard" (at workflow/summary, by default), which displays a summary of all of the nodes, their current states within the workflow, etc. If the page is reported to not exist, check the access setting in the view's page settings.
A dynamic list is fine, but more immediate notification could be valuable and can be implemented using the core Trigger module in conjunction with the Workflow Trigger submodule. (An alternative is the Rules module, which allows you to automate various tasks and actions when certain events occur, based on conditions and contextual information.) For example, on the Actions configuration page (admin/config/system/actions), you could define a new advanced action to send an email message to the moderator.
On the Triggers configuration page (admin/structure/trigger/node), you would then assign that action to the trigger that fires when an article node transitions from "Write" to "Moderate".
The Beginning of a Beautiful Friendship
There is much more that can be done with these modules, as well as others not mentioned here. Yet hopefully this introduction has demonstrated how these modules can work effectively together in order to help any organization set up and monitor the path of each piece of content from one stage in its development to another.
Image: "Sunset shot of Hassan II Mosque" by Marshallhenrie via Wikimedia Commons (Own work) is licensed under CC BY-SA 4.0
